Raise your hand if you have ever picked the perfect paint colour off a paint chip only to get the room completely done and realized it isn’t going to work. Yep! My hand is up! All that time, effort and money invested in the room, not to mention the ‘discussions’ with your significant other or the dog and you are soooo disappointed. Read on for 3 steps that will save you not only time, money and aggravation but result in a colour and ambience that you are much happier with.
1. Sample Pots
Every paint company and supplier will sell you small sample pots in any colour you would like. In fact, some have samples already mixed and immediately available. I love sample pots; you get more than enough paint to do a descent sized swatch, the cost is much less than buying a gallon or two of paint only to be disappointed and any leftovers can be used for a DIY project or to paint a small accessory in your newly updated room.

2. Paint a Patch
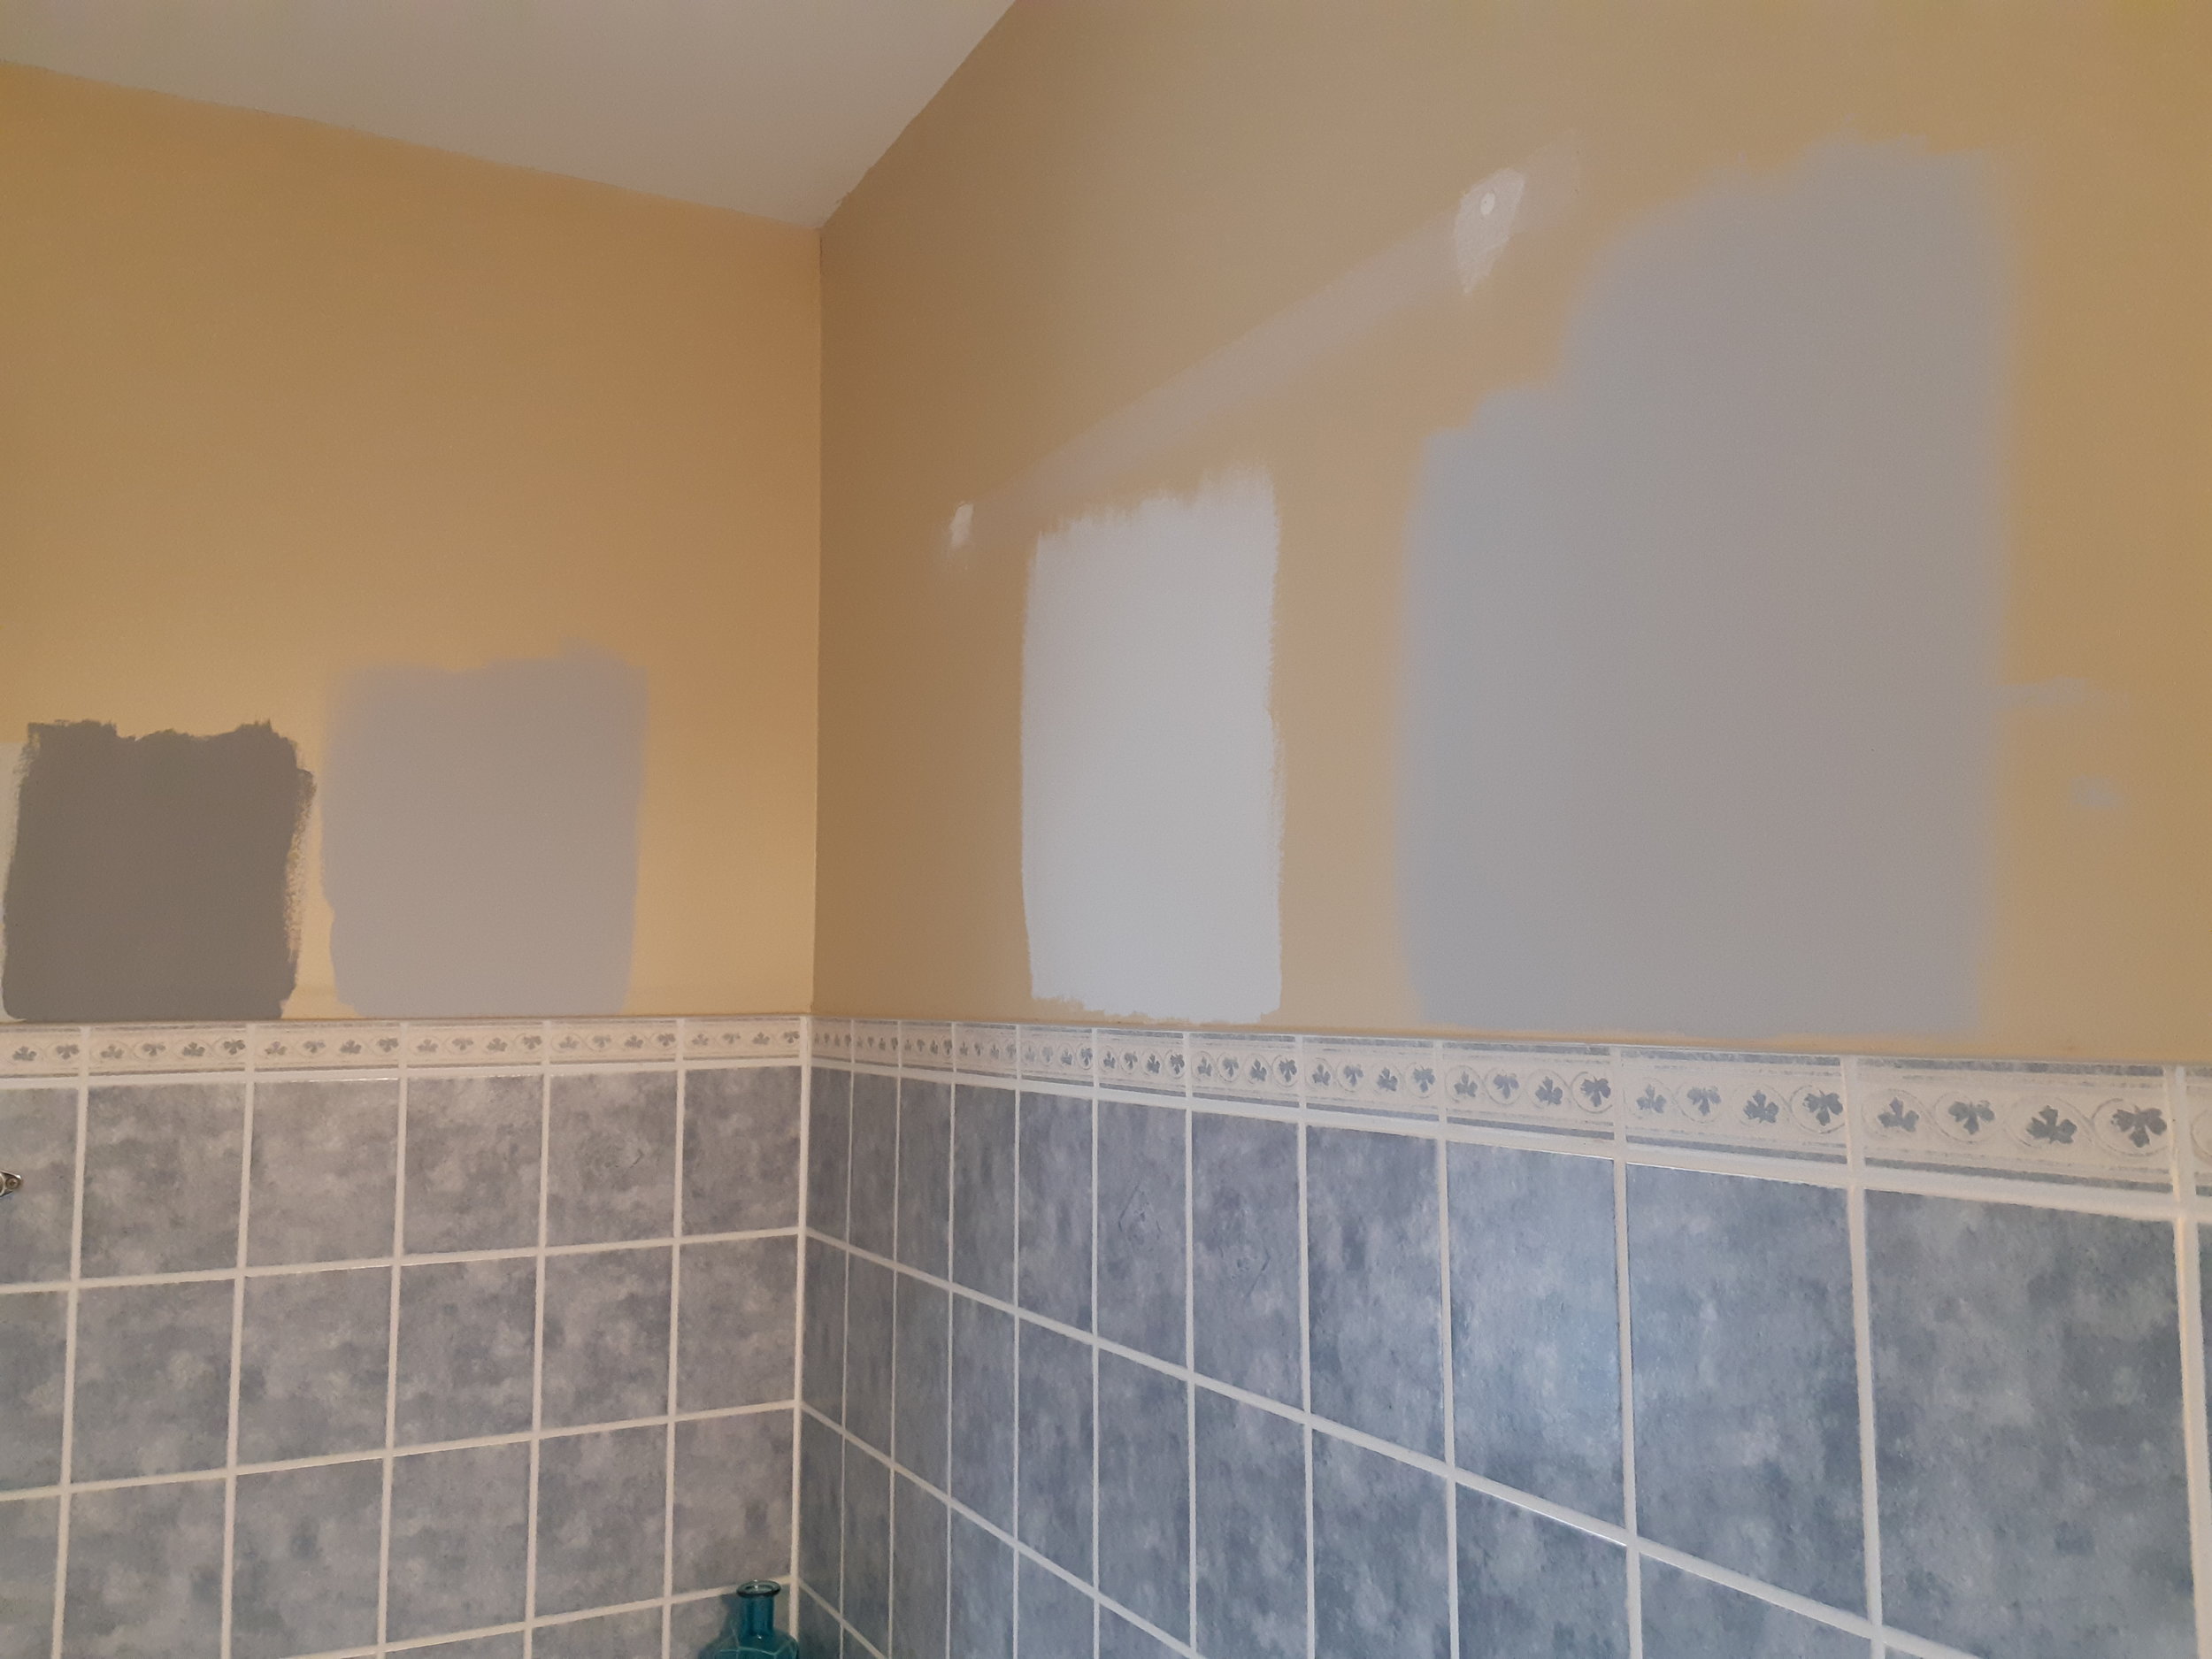
I know you are really anxious to just get the room painted and feel this is a wasted step. Remember your hand being raised per above?! I have had clients skip this all important step only to admit afterwards they weren’t 100% happy with the colour. Do yourself a favour - paint a 3x3 patch in the space you are going to paint, preferably on 2 different walls. Leave the patch long enough that you can observe the colour throughout an entire day to see how the colour appears at various times with the changing light and for enough days that you can observe the colour during sunny days and overcast days.
This all important step saves time too. It doesn’t take long to paint a patch and if you aren’t fussed with the colour you have only invested the time required to paint that swatch and it is much easier to paint over that small area instead of having to repaint the entire room.
3. Frame the Patch
Painting the patch with a ‘frame’ that is the colour selected for the trims will separate the patch from the current wall colour and allow you to see the new wall colour in its purest form. This step will also allow you to see how the wall and trim colours are going to behave together. Many of us select a shade of white for the trims but trust me, there are thousands of shades of white!
I know that once you have decided to update your rooms, you want to move forward and get the job completed - I get that! But being patient and ‘investing’ a bit of time in these 3 important steps will result in a space that you are much happier and more comfortable with. And while you are planning your updates, stay tuned for a blog on paint finishes and what to use where.
For more decor and design inspiration, follow Simply Swank Decor on:
Facebook (https://www.facebook.com/simplyswankhomedecor/)
Pinterest (https://www.pinterest.ca/simplyswankdeco/)
Instagram (https://www.instagram.com/simplyswankdecor/)